Sunday, December 26, 2010
Merry Christmas!!
I haven't blogged for AGES and I promise I will soon, but just before it gets to 12am, I'd like you wish you all a MERRY CHRISTMAS!

Tuesday, November 16, 2010
Featherlight cheesecake

The first sight you'd see if you walked into a primary school classroom would be the interesting artworks, mounted onto brightly coloured cardboard strung up in neat rows above your head and stuck onto onto every bit of wall. There'd always be the beautiful artworks which immediately draw your attention and there'd be the simple and ordinary artworks surrounding it, quickly forgotten unless it was created by yourself or your own child. My artworks always fell into the latter category- I was never the artistic type. My drawings only ever barely resembled what I'd attempt to draw. My paintings were even worse. And I could never get my colour combinations right.
In the first two years of high school, when I did visual arts, I always got average marks. I remember the first, and only, time I ever got a full marks for a cartoon, in which I'd drawn fruits simply because they were colourful and easy to draw. I was completely perplexed as to why I'd done so well, when so many others which I'd found very impressive scored lower whilst mine consisterd of simple line drawings with circles for eyes and a line for a mouth, like this :)

As much as I found other people's artworks impressive, nothing quite compared to my amazement the day we chanced upon my friend, Steph's, artbook. She'd been in a different class and so I'd never seen any of her artwork, but when we accidently pulled her book out of the cupboard, we only needed to turn to her title page to be completely mesmerised by her artwork. We spent the remainder of the lesson slowly marvelling through her beautiful drawings and paintings. I'd never seen anything quite as amazing in real life and to this day, I'm still amazed by all her artwork- so much so that I was inspired to do something I hadn't done for ages- pick up a pencil and draw something.
Never one to learn to walk before running, I decided that while I was at it, I might as well fulfill my mother's wish of having a portrait of her drawn (a wish she's had even before I was born) so I grabbed a nice photo of her, a blank piece of paper and set about sketching her face. I picked up my pencil, slowly tracing out the shape before slowly sketching each and every little detail and actually found myself enjoying it! Before I knew it, hours had passed, the side of my hand had been coloured dark grey and I'd created my first portrait.
It was a rather amateur and childish attempt, probably describable as cute more than anything and definitely miles and miles and miles away from Steph's artwork. But still, the face was immediately recognisable, if a little dispropotioned and unlike anything I'd ever done before. And I was proud of it.
It's amazing how far a little effort can really get you!

But putting a little effort sometimes isn't quite as easy as it seems. With my cakes I always think that if I just put that teenie weenie bit more effort into decorating the cakes, they'd look a lot more presentable. But despite planning to do so, I always find I put so much too much time and effort into making sure that the cake itself tastes great, that by the time I get around to icing and 'decorating', I'll just slather the frosting on and hope for the best.
Decorating a cake prettily for me is an especially difficult task because I'm not a creative person. I can't just think of a nice way to arrange decorations on a cake and even when I'm copying a design, it never turns out quite right. But not being creative is not an excuse for anything- it means working harder to make up for it. My usual solution to any situation which requires creativity, whether it be designing something, decorating a cake or writing a creative writing piece, is to get inspiration from others. This is the reason I have a whole pile of cake shop brochures from Hong Kong which I look at whenever I'm baking a sponge cake.
I was determined to make this cake look good, so I chose a simple design- one which really could go wrong. One which requires close to no skill but still looks amazing. This cake design is completely copied from the bakery Patisserie-C'est Mieux. Admittedly, I don't actually remember taking the brochure in the first place, but their cake designs were all simple yet beautiful.

For the cake, I decided to use a cheesecake simply because that was what was used in the brochure- and it gave me an excuse to try this featherlight cheesecake from Wendy's blog. True to it's name, it was very light- perhaps one of the lightest cakes I've ever made. I made the mistake of taking it out of the oven too early (because I think my electric oven is a little on the cool side) and had to put it back in the oven again after it had cooled considerably and then accidently left it in the oven after turning it off. This left the bottom half of the cake really weird but the top half of the cake was still perfect- light (but in a different way to most sponges) and delicious but surprisingly not cheesy!!
As for the cake decorating, it didn't come out as beautifully as in the brochure- I should have used a bigger spoon and fork and my fruit arrangement is rather messy but it still looked pretty good and I was proud of it =) It'll probably be a while until I start thinking of my own designs but I think I'll take it one step at a time!

Featherlight Cheesecake from Wendy
250gm milk
20gm butter
125gm cream cheese(room temperature)
50gm flour
3 egg yolks
1 tsp vanilla extract
3 egg whites
1/8 tsp cream of tartar
80gm sugar
Pinch of salt
½ Tbsp cocoa powder (I omitted this)
1 Tbsp boiling water (I omitted this)
1. Line the base of a 8 inch square pan and preheat the oven at 150/160C.
2. In a medium sized bowl, cream cream cheese until smooth.
3. Bring milk and butter to a boil and pour ¼ of it into cream cheese and gently stir until incorporated. Pour in another ¼ the milk and stir again. Lastly pour in all the milk and stir until smooth. (At this point, prepare some boiling water)
4. Let the cheese mixture cool down and put in flour. Mix until smooth. Then put in egg yolks and vanilla. Mix until smooth.
5. In another clean bowl, beat egg whites until frothy. Put in salt and cream of tartar and beat until soft peaks. Put in sugar gradually and beat until stiff.
6. Put 1/3 of egg whites into cheese mixture and fold gently but quickly.
7. Pour the cheese mixture into the egg whites and fold until well incorporated.
8. Mix cocoa powder with boiling water until smooth. Put in a few tablespoons of the cheese batter and mix until a smooth chocolatey batter is formed.Pour main cheese batter into prepared pan. Drizzle chocolate batter over main cheese batter. Use a knife and cut through the batter to create a marbling effect.(I skipped this step)
9. Put pan into slightly bigger but shallower pan. Fill the bigger pan with boiling water until halfway up and bake for 50-60 minutes.
10. When cake is baked, remove from oven and release the sides of the cake from the pan immediately by running a knife between the sides of the cake and the pan. Leave it to cool down totally and chill until cold before cutting.
Saturday, November 13, 2010
Pad Thai
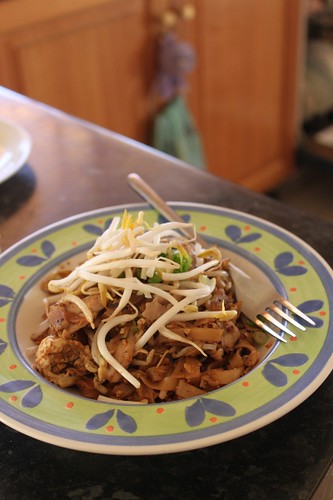
I love watching my mother cook.
There's something mesmerising about the way she moves swiftly through the kichen that keeps me standing there, watching her for hours. I love the unique way she cooks, the way she manoeuvres the spatula and her clever tricks -for instance, the way she loads up the wok with raw veggies and scoops them with the wok lid before they start to wilt, to cook them all without them falling out. I love how effortless she makes cooking seem, simply tossing all the ingredients in our tiny wok, so that each an every piece is cooked equally.
It isn't as easy as it seems- I would know. Everytime I try cooking in a wok, I feel more like I'm folding the ingredients roughly rather than cooking, and I can't seem to cook everything evenly, no matter how hard I try to mimic my mother's movements. The first time I tried to cook vegetables, my mum told me to add oyster sauce, and copying the way she adds wine, I poured it around the vegetables, straight onto the flaming hot wok. Of course, it immediately sizzled fiercely and burnt, creating a mess, much to my mother's annoyance. I stayed away from cooking for a while.
I think one of the reasons why I have more of an interest in baking than cooking is because no one else in this household already does it well. There isn't anyone to constantly tell me what I'm doing wrong- I can do whatever I want, learn from my mistakes and figure things out myself. And importantly, there's a slightly greater sense of satisfaction in succeeeding where no one else you know has succeeded before.
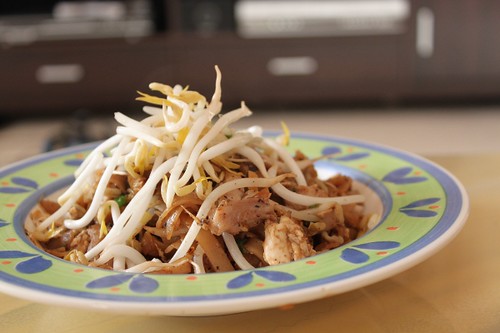
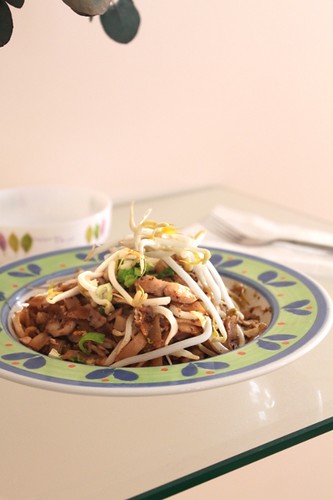
So it'll come to no surprise that my cooking hardly ever features on this blog- I rarely 'cook'. And when I do, you'll most likely find my cooking up something new and different to what my mother would usually cook, like this pad thai- one of the few dishes I regularly cook. At first I was a little scared of stir frying, especially as the noodles could possibly stick to the work and cause a mess. Luckily they didn't and the recipe really couldn't be any simpler- it's just a matter of mixing up a sauce which consists of 4 ingredients, and then stir frying it with rice noodles and whatever else you feel like throwing in =)
We were also quite skeptical of the recipe at first because of the one strange ingredient we'd never even heard of before- tamarind. It is extremely pungent as other blogger had me warned, infact so stinky, the first time we made it, we were almost sure that it wouldn't work out. But we were pleasantly surprised when it did and it was so good, that I could immediately think of plenty of pad thai dishes I'd had at restaurants that were inferior to this.
This pad thai has since become our go to dish whenever we're looking for something different for dinner. We usually make a huge pot of sauce and keep the remainder in the freezer (which led to a really cool discovery- it doesn't actually become solid in the freeer!) and then stir fry it with the noodles whenever we feel like a pad thai.
And thanks very much to this recipe, I've had plenty of practice with stir frying- I think I'll soon be able to cook like my mum!! (or...maybe not.......)
Pad Thai
from Chez Pim via Use Real Butter
vegetable oil (for frying)
12 oz. chicken (2 oz. per serving)
4 cloves (10g) minced garlic (about 1/2+ clove per serving) sauce (see below) (about 1/4 cup per serving)
1 lb. (500g) rice noodles, soaked in warm water to soften (but not too soft)
6 eggs (1 egg per serving)
1 lb. shrimp, peeled and deveined (4-6 shrimp per serving)
1 cup (155g) ground peanuts (1-2 tbsps per serving)
3-4 cups bean sprouts (1/2 cup per serving)
1/2 cup (75g) pickled turnips, chopped (1+ tbsp per serving)
1 cup garlic chives or green onions, chopped (2 tbsps per serving)
moresprouts (garnish)
fresh limes (garnish)
sauce
1/2 cup (130g) tamarind paste
1/2 cup (120g) fish sauce
1/3 cup (75g) brown sugar
1 tbsp (9g) chili powder (to taste- I omit this)
Make the sauce: Over a low flame, heat the tamarind, fish sauce, and brown sugar together until the sugar is dissolved. Stir in the chili powder a teaspoon at a time to desired spiciness. (I sometimes add a teaspoon or two of dark soy sauce to deepen the colour- the colour of the sauce will depend on the colour of your ingredients) Bring the sauce to a simmer. Turn off the heat (keep sauce warm).
Make the pad thai: [The key is to cook up 1-2 servings at a time!] Heat 2-3 tablespoons ofoil in wok or large frying pan over high heat. Add 2 ounces of chicken andstir-fry until it is half cooked. Add 1-2 tablespoons of sauce, and a pinch of
garlic. Stir around and add about 2 cups of loosely packed (for me, a big handful)of rice noodles plus 1/4 cup of sauce to the pan and stir vigorously until the noodles soften. If it dries out, you can add some water. Push the noodles to the side and crack an egg into the pan. Let the egg cook for 10 seconds and then toss the noodles and egg together in the pan. Drop 4-6 shrimp, a couple of tablespoons of ground peanuts, a heaping tablespoon of turnip, and 1/2 cup of sprouts into the pan. Stir fry until the shrimp are just cooked (very fast – about a minute). Toss in the green onions or garlic chives and remove from heat. Serve hot with more sprouts, ground peanuts, and lime wedges for garnish.
Subscribe to:
Posts (Atom)


