Sunday, December 26, 2010
Merry Christmas!!
Tuesday, November 16, 2010
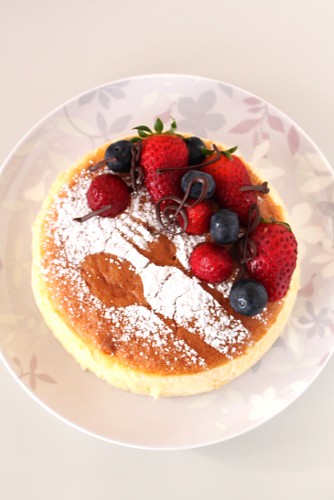
Featherlight cheesecake
The first sight you'd see if you walked into a primary school classroom would be the interesting artworks, mounted onto brightly coloured cardboard strung up in neat rows above your head and stuck onto onto every bit of wall. There'd always be the beautiful artworks which immediately draw your attention and there'd be the simple and ordinary artworks surrounding it, quickly forgotten unless it was created by yourself or your own child. My artworks always fell into the latter category- I was never the artistic type. My drawings only ever barely resembled what I'd attempt to draw. My paintings were even worse. And I could never get my colour combinations right.
In the first two years of high school, when I did visual arts, I always got average marks. I remember the first, and only, time I ever got a full marks for a cartoon, in which I'd drawn fruits simply because they were colourful and easy to draw. I was completely perplexed as to why I'd done so well, when so many others which I'd found very impressive scored lower whilst mine consisterd of simple line drawings with circles for eyes and a line for a mouth, like this :)
As much as I found other people's artworks impressive, nothing quite compared to my amazement the day we chanced upon my friend, Steph's, artbook. She'd been in a different class and so I'd never seen any of her artwork, but when we accidently pulled her book out of the cupboard, we only needed to turn to her title page to be completely mesmerised by her artwork. We spent the remainder of the lesson slowly marvelling through her beautiful drawings and paintings. I'd never seen anything quite as amazing in real life and to this day, I'm still amazed by all her artwork- so much so that I was inspired to do something I hadn't done for ages- pick up a pencil and draw something.
Never one to learn to walk before running, I decided that while I was at it, I might as well fulfill my mother's wish of having a portrait of her drawn (a wish she's had even before I was born) so I grabbed a nice photo of her, a blank piece of paper and set about sketching her face. I picked up my pencil, slowly tracing out the shape before slowly sketching each and every little detail and actually found myself enjoying it! Before I knew it, hours had passed, the side of my hand had been coloured dark grey and I'd created my first portrait.
It was a rather amateur and childish attempt, probably describable as cute more than anything and definitely miles and miles and miles away from Steph's artwork. But still, the face was immediately recognisable, if a little dispropotioned and unlike anything I'd ever done before. And I was proud of it.
It's amazing how far a little effort can really get you!
But putting a little effort sometimes isn't quite as easy as it seems. With my cakes I always think that if I just put that teenie weenie bit more effort into decorating the cakes, they'd look a lot more presentable. But despite planning to do so, I always find I put so much too much time and effort into making sure that the cake itself tastes great, that by the time I get around to icing and 'decorating', I'll just slather the frosting on and hope for the best.
Decorating a cake prettily for me is an especially difficult task because I'm not a creative person. I can't just think of a nice way to arrange decorations on a cake and even when I'm copying a design, it never turns out quite right. But not being creative is not an excuse for anything- it means working harder to make up for it. My usual solution to any situation which requires creativity, whether it be designing something, decorating a cake or writing a creative writing piece, is to get inspiration from others. This is the reason I have a whole pile of cake shop brochures from Hong Kong which I look at whenever I'm baking a sponge cake.
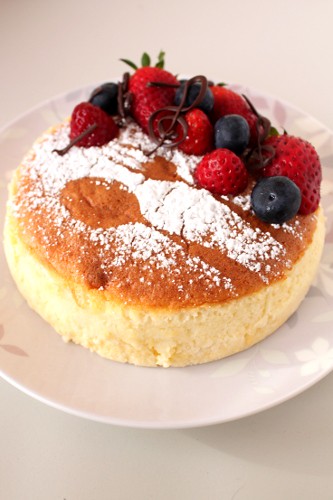
I was determined to make this cake look good, so I chose a simple design- one which really could go wrong. One which requires close to no skill but still looks amazing. This cake design is completely copied from the bakery Patisserie-C'est Mieux. Admittedly, I don't actually remember taking the brochure in the first place, but their cake designs were all simple yet beautiful.
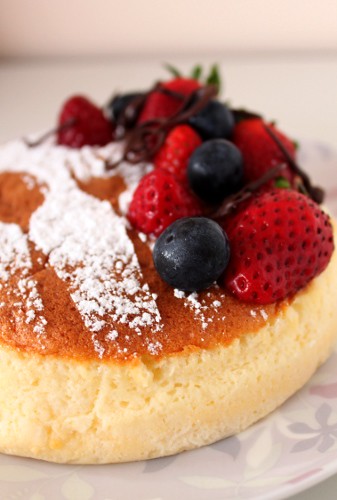
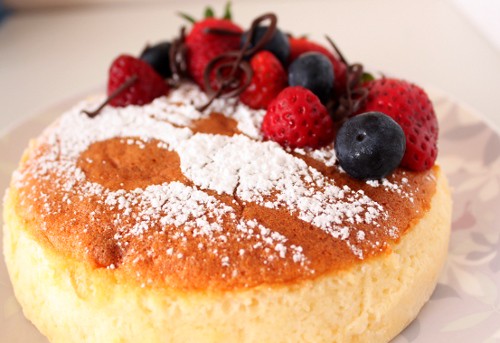
For the cake, I decided to use a cheesecake simply because that was what was used in the brochure- and it gave me an excuse to try this featherlight cheesecake from Wendy's blog. True to it's name, it was very light- perhaps one of the lightest cakes I've ever made. I made the mistake of taking it out of the oven too early (because I think my electric oven is a little on the cool side) and had to put it back in the oven again after it had cooled considerably and then accidently left it in the oven after turning it off. This left the bottom half of the cake really weird but the top half of the cake was still perfect- light (but in a different way to most sponges) and delicious but surprisingly not cheesy!!
As for the cake decorating, it didn't come out as beautifully as in the brochure- I should have used a bigger spoon and fork and my fruit arrangement is rather messy but it still looked pretty good and I was proud of it =) It'll probably be a while until I start thinking of my own designs but I think I'll take it one step at a time!
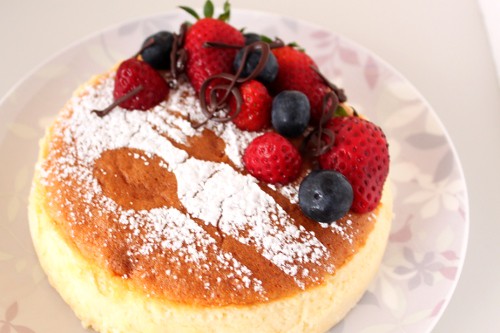
Featherlight Cheesecake from Wendy
250gm milk
20gm butter
125gm cream cheese(room temperature)
50gm flour
3 egg yolks
1 tsp vanilla extract
3 egg whites
1/8 tsp cream of tartar
80gm sugar
Pinch of salt
½ Tbsp cocoa powder (I omitted this)
1 Tbsp boiling water (I omitted this)
1. Line the base of a 8 inch square pan and preheat the oven at 150/160C.
2. In a medium sized bowl, cream cream cheese until smooth.
3. Bring milk and butter to a boil and pour ¼ of it into cream cheese and gently stir until incorporated. Pour in another ¼ the milk and stir again. Lastly pour in all the milk and stir until smooth. (At this point, prepare some boiling water)
4. Let the cheese mixture cool down and put in flour. Mix until smooth. Then put in egg yolks and vanilla. Mix until smooth.
5. In another clean bowl, beat egg whites until frothy. Put in salt and cream of tartar and beat until soft peaks. Put in sugar gradually and beat until stiff.
6. Put 1/3 of egg whites into cheese mixture and fold gently but quickly.
7. Pour the cheese mixture into the egg whites and fold until well incorporated.
8. Mix cocoa powder with boiling water until smooth. Put in a few tablespoons of the cheese batter and mix until a smooth chocolatey batter is formed.Pour main cheese batter into prepared pan. Drizzle chocolate batter over main cheese batter. Use a knife and cut through the batter to create a marbling effect.(I skipped this step)
9. Put pan into slightly bigger but shallower pan. Fill the bigger pan with boiling water until halfway up and bake for 50-60 minutes.
10. When cake is baked, remove from oven and release the sides of the cake from the pan immediately by running a knife between the sides of the cake and the pan. Leave it to cool down totally and chill until cold before cutting.
Saturday, November 13, 2010
Pad Thai
I love watching my mother cook.
There's something mesmerising about the way she moves swiftly through the kichen that keeps me standing there, watching her for hours. I love the unique way she cooks, the way she manoeuvres the spatula and her clever tricks -for instance, the way she loads up the wok with raw veggies and scoops them with the wok lid before they start to wilt, to cook them all without them falling out. I love how effortless she makes cooking seem, simply tossing all the ingredients in our tiny wok, so that each an every piece is cooked equally.
It isn't as easy as it seems- I would know. Everytime I try cooking in a wok, I feel more like I'm folding the ingredients roughly rather than cooking, and I can't seem to cook everything evenly, no matter how hard I try to mimic my mother's movements. The first time I tried to cook vegetables, my mum told me to add oyster sauce, and copying the way she adds wine, I poured it around the vegetables, straight onto the flaming hot wok. Of course, it immediately sizzled fiercely and burnt, creating a mess, much to my mother's annoyance. I stayed away from cooking for a while.
I think one of the reasons why I have more of an interest in baking than cooking is because no one else in this household already does it well. There isn't anyone to constantly tell me what I'm doing wrong- I can do whatever I want, learn from my mistakes and figure things out myself. And importantly, there's a slightly greater sense of satisfaction in succeeeding where no one else you know has succeeded before.
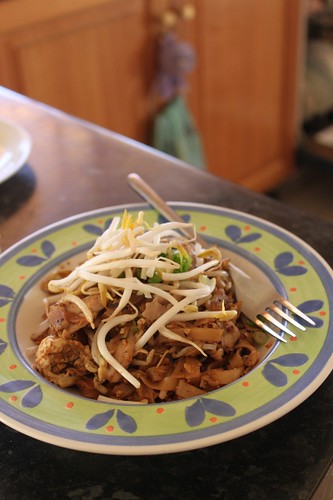
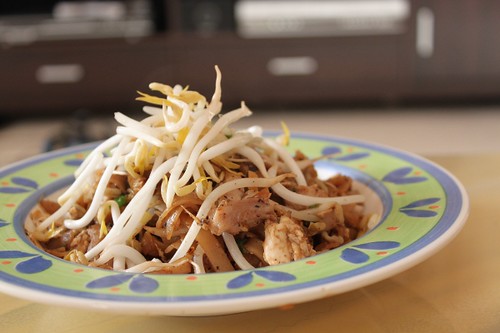
So it'll come to no surprise that my cooking hardly ever features on this blog- I rarely 'cook'. And when I do, you'll most likely find my cooking up something new and different to what my mother would usually cook, like this pad thai- one of the few dishes I regularly cook. At first I was a little scared of stir frying, especially as the noodles could possibly stick to the work and cause a mess. Luckily they didn't and the recipe really couldn't be any simpler- it's just a matter of mixing up a sauce which consists of 4 ingredients, and then stir frying it with rice noodles and whatever else you feel like throwing in =)
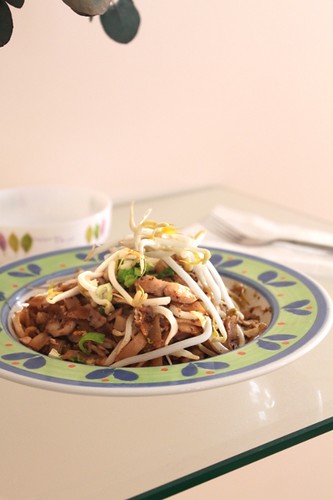
We were also quite skeptical of the recipe at first because of the one strange ingredient we'd never even heard of before- tamarind. It is extremely pungent as other blogger had me warned, infact so stinky, the first time we made it, we were almost sure that it wouldn't work out. But we were pleasantly surprised when it did and it was so good, that I could immediately think of plenty of pad thai dishes I'd had at restaurants that were inferior to this.
This pad thai has since become our go to dish whenever we're looking for something different for dinner. We usually make a huge pot of sauce and keep the remainder in the freezer (which led to a really cool discovery- it doesn't actually become solid in the freeer!) and then stir fry it with the noodles whenever we feel like a pad thai.
And thanks very much to this recipe, I've had plenty of practice with stir frying- I think I'll soon be able to cook like my mum!! (or...maybe not.......)
Pad Thai
from Chez Pim via Use Real Butter
vegetable oil (for frying)
12 oz. chicken (2 oz. per serving)
4 cloves (10g) minced garlic (about 1/2+ clove per serving) sauce (see below) (about 1/4 cup per serving)
1 lb. (500g) rice noodles, soaked in warm water to soften (but not too soft)
6 eggs (1 egg per serving)
1 lb. shrimp, peeled and deveined (4-6 shrimp per serving)
1 cup (155g) ground peanuts (1-2 tbsps per serving)
3-4 cups bean sprouts (1/2 cup per serving)
1/2 cup (75g) pickled turnips, chopped (1+ tbsp per serving)
1 cup garlic chives or green onions, chopped (2 tbsps per serving)
moresprouts (garnish)
fresh limes (garnish)
sauce
1/2 cup (130g) tamarind paste
1/2 cup (120g) fish sauce
1/3 cup (75g) brown sugar
1 tbsp (9g) chili powder (to taste- I omit this)
Make the sauce: Over a low flame, heat the tamarind, fish sauce, and brown sugar together until the sugar is dissolved. Stir in the chili powder a teaspoon at a time to desired spiciness. (I sometimes add a teaspoon or two of dark soy sauce to deepen the colour- the colour of the sauce will depend on the colour of your ingredients) Bring the sauce to a simmer. Turn off the heat (keep sauce warm).
Make the pad thai: [The key is to cook up 1-2 servings at a time!] Heat 2-3 tablespoons ofoil in wok or large frying pan over high heat. Add 2 ounces of chicken andstir-fry until it is half cooked. Add 1-2 tablespoons of sauce, and a pinch of
garlic. Stir around and add about 2 cups of loosely packed (for me, a big handful)of rice noodles plus 1/4 cup of sauce to the pan and stir vigorously until the noodles soften. If it dries out, you can add some water. Push the noodles to the side and crack an egg into the pan. Let the egg cook for 10 seconds and then toss the noodles and egg together in the pan. Drop 4-6 shrimp, a couple of tablespoons of ground peanuts, a heaping tablespoon of turnip, and 1/2 cup of sprouts into the pan. Stir fry until the shrimp are just cooked (very fast – about a minute). Toss in the green onions or garlic chives and remove from heat. Serve hot with more sprouts, ground peanuts, and lime wedges for garnish.
Sunday, November 7, 2010
Freedom.....tastes even better than this tart!
I'm free I'm free I'm free I'm free!!!!
As some of you have already figured out, I've finished my HSC (on Thursday, to be exact)! Unfortunately, I've only been able to write up this post becasue I've been:
1. busy celebrating :) Although in my world, celebrating involves lots of sleep, baking and relaxing...
2. busy de-cluttering my life of study related things- which involves throwing out lots and lots of paper and trying to somehow organise the leftovers for my sister incase she ever needs it.
3. too lazy to type out the recipe below :)

Unfortunately, the exams didn't quite end as spectacularly as I'd hoped.....I don't remember much about the exam itself, as I was too busy looking forward to after the exam. But I did finish the exam busting to go to the toilet, so much so that I couldn't hold it in any longer and had to rush out whilst the exam supervisors were collecting the papers :S If I ever do a three hour long exam again, I'll remember not to bring in my drink bottle, or drink much water beforehand.....
But it is still the end, and I couldn't really be happier that the exams are finally over! Waking up and realising that I don't need to study today is really one of the best feeling. Ever.
I don't think I've completely gotten out of study mode yet- it feels a little weird to not have to cram some useless information into my head everyday. Even my parents think I'm going to study, whenever I make my way to my table, only to realise that don't need to anymore!

The first thing I did when I got home after the exam (after pigging out during lunch), was to grab the mixing bowl and electric mixer and start making my favourite pound cake. It was great to once again hear the familiar sound of the electric beater whirring and scraping the plastic bowl and smell the delicious scents of butter and egg wafting out of the oven! I do really really love baking =)
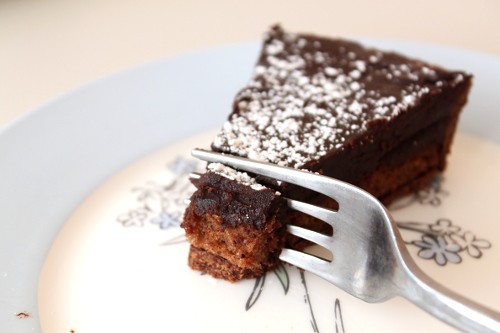
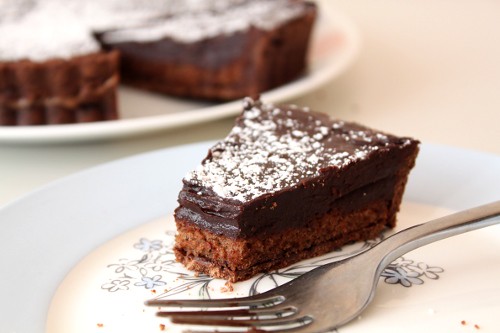
Which is why I couldn't resist making this decadent chocolate tart during the exam period- the perfect way to make countless hours of boring studying slightly better =) I've wanted to make a chocolate tart for a while now, but this recipe really caught my attention because of the layer of light sponge cake, underneath the rich chocolate truffle filling. Don't you just love it how Asians find a way to put a piece of sponge cake in almost any dessert??
The tart comprises of four main components- the pastry, the sponge, the truffle filling and the chocolate glaze. I thought it was weird how the glaze had less glucose than the filling (since glucose is supposed to make it shiny?) and found that the filling and the glaze were pretty much the same thing and so they sort of became one layer. My filling also wasn't as soft and shiny as that in the book, which I suspect may have something to with the fact that I used thickened cream???
But the taste of the tart exceeded all expectations, and we instantly fell in love the with smooth chocolate filling, coupled with the light, chocolate sponge and delicious chocolate tart pastry. This recipe's definitely a keeper- it's not too hard to guess what I'll be making in these next few weeks!!
Chocolate Truffle Tart
From Dessert for You by Rachel Yau
Cocoa Sponge Base
75g eggs (around 1 and a hlaf eggs)
35g sugar
50g cake flour
45g butter
30g milk
10g cocoa
1. Preheat oven to 180C. Sieve flour and cocoa together.
2. Healt the milk and add butter. Stir until it melts
3. Beat the eggs with an electric mixer until foamy. Add sugar and beat until pale and thick.
4. Sieve in flour and cocoa. Fold in without disturbing the bubbles too much. Add the butter and milk mixture from step 2 and stir gently until well mixed
5. Pour in the batter into a baking tray. Bake in the preheated oven for 15 minutes. Turn the cake out while still hot. Leave it to cool.
Cocoa Pie crust (pastry)
100g flour
20g cocoa
60g butter
1/2 egg (beaten)
30g sugar
1. In a bowl, rub flour, cocoa, butter and sugar with your fingertips until crumbly.
2. Add beaten egg and knead well (I had to add a few drops of milk so that the dough would come together. Wrap the dough in cling wrap and refrigerate for 15 minutes.
3. line the counter with cling wrap. Place the chilled dough over the cling wrap. Place anothing cling wrap on the dough. Roll it out until 1cm thick.
4. Place the rolled dough into the 8 inch round mould. Make sure the crusts go all the way up the vertical sides of the mould. Trim off the excess above the rim. Pierce all over with a fork. Line the crust with baking paper and fill with baking beans.
5. Blind bake the crust at 180C for 10 minutes. Remove the baking paper and baking beans. Bake for 10 minute more. Leave to cool to room temperature.
Chocolate Truffle Filling
100g dark chocolate
115ml whipping cream
40g butter
11g liquid glucose
15ml rum (I omitted this)
1. Chop the chocolate up.
2. Heat the whipping cream until tit bubbles gently then add chopped chocolate, rum and glucose. Stir until they melt. Leave to cool.
Chocolate Glaze
100g dark chocolate
40ml milk
3.5g liquid glucose
3.5g butter
Boil the milk gently and stir in the chocolate until it melts. Add glucose and butter. Stir well and turn off the heat.
To Assemble
1. Brush the inside of the pastry with melted chocolate. Put in the chocolate sponge base. Spread the chocolate truffle filling over the sponge. Refrigerate until set.
2. Pour the chocolate glaze on top and spread evenly. Sprinkle cocoa powder and garnish.
Monday, November 1, 2010
Thai chicken pizza
These were the words of my best friend in year 4, when I gave her a little gift. It was a bag of bright pink 'magic' sand with which we'd been playing with a couple days before- I could tell she really liked it. I casually remarked 'Oh, I didn't want it anymore' not because I actually didn't want it, but I don't know about you, but I feel bad when someone gives me something they really like. I didn't really think about how it would make it feel like accepting someone else's rubbish =S
These same words ran through my head, as my mother rummaged through our pantry to find packets of lollies and chocolate to hand out to the little trick-or-treating kids. We found many packets of opened chocolates and lollies, even more packets of unopened chocolates, easter eggs (hehe..at least they were from this year's easter?) and loads and loads of expired confectionary which filled our bins pretty quickly. (only the perfect, unopened, unexpired ones went to the little kiddies, I assure you) I don't think our pantry has had quite a clean out since last halloween!
We ended up getting two knocks on our door- the most we've ever had :) I guess halloween is getting more popular now- I was delighted when I saw one of our neighbours decorated their house, if only for one night, with fake spiderwebs and pumpkins!
Unfortunately, I was stuck at home, bored,
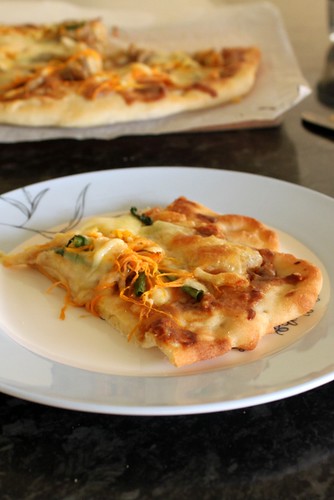
I'm rather proud of myself for not blogging for *gasp* two weeks (okayokay....so maybe I've done so before, but not during an exam period!). But of course, I couldn't resist staying away from the kitchen. So on the one day my parents were out, I snuck into the kitchen to make pizza!
I've never had a non tomato sauce based pizza before, so I did find this slightly weird at first. I only used the recipe for the base and the sauce and then I topped it with some left overs and whatever else I could find in the fridge which didn't take too long to chop up ;P I absolutely loved the sauce- it was so addictive that I had only intended to eat half the pizza but then accidently gulped the whole thing down.....hehe =)

Anyways, shall go back to studying now :) I finish exams on Thursday (yay!) so (maybe) watch out for even yummier things here in the near future!!
Thai Chicken Pizza
Adapted from allrecipes
1 cup warm water (110 degrees F/45 degrees C)
1 tablespoon honey
2 teaspoons active dry yeast
3 cups all-purpose flour
1 teaspoon salt
2 tablespoons olive oil
3 1/2 tablespoons peanut butter
3 tablespoons rice vinegar (I'd probably decrease to 1-2 tablesoons as I found it too sour for my tastes)
2 tablespoons soy sauce
2 teaspoons chili oil
1 tablespoon minced fresh ginger
2 teaspoons honey
1 boneless chicken breast half, cooked and sliced into thin strips
2 tablespoons toasted sesame seeds
1 tablespoon paprika
1 small fresh red chile pepper, finely chopped
1 teaspoon salt
4 green onions, sliced
1 cup grated mozzarella cheese
1 carrot, peeled and grated
1/4 cup chopped fresh cilantro
1.Pour warm water into a small bowl; stir in honey until dissolved. Add the yeast, stirring until dissolved. Let stand until creamy, about 10 minutes.
2.In a large bowl, combine the flour and salt. Add yeast mixture and olive oil; stir well to combine. When the dough has pulled together, turn it out onto a lightly floured surface and knead in more flour until the dough is no longer sticky. Lightly oil a large bowl, place the dough in the bowl and turn to coat with oil. Cover with a damp cloth and let rise in a warm place until doubled in volume, about 1 hour.
3.Preheat oven to 350 degrees F (175 degrees C).
4.Punch down the risen dough on a floured surface. Divide into two equal portions. Allow the dough to relax for a minute, then roll each portion out into a thin circle. Place on lightly oiled pizza pans.
5.To make the peanut sauce, place peanut butter, rice vinegar, and soy sauce in a blender. Add chili oil, ginger, and honey; process until smooth.
6.In a medium bowl, combine the chicken, sesame seeds, paprika, chile peppers, salt, and 3 tablespoons of the peanut sauce. Mix until the chicken is evenly coated. Spread the remaining peanut sauce evenly over pizza dough. Top with chicken, green onions, and cheese.
7.Bake in preheated oven for 20 minutes or until cheese is lightly browned. Garnish with carrots and cilantro.
Friday, October 15, 2010
Study+study+study = going crazy

First HSC exam today! *gasp*
Okayokay- so maybe it's not such a big deal =) I didn't start studying last night (for once) and so I got some sleep. Although my mum accidently turned on my electric blanket (on high might I add) in the morning when she was changing my sheets, meaning that I spent half the night being fried on my bed instead of sleeping! Don't worry, I turned around occasionally to make sure that I seared evenly =)

But even spending half the night awake, I didn't think any exam thoughts. It was strangely.....normal. No 'what if' thoughts, no 'I'm going to fail' or even trying to go through my essay at all. I think I'm skilfully mastering the art of blocking out bad thoughts from my head!
I can happily forget my no-so-pleasing marks that I might have gotten a few weeks ago. I can easily forget that there's a HSC to study for- until I return to my desk and see a pile of books waiting to be studied. In fact, the only thing I really think about now is what I'm going to do after the exams- all the food I'm going to cook, all the places I'm going to eat at, all the blogging I'll do.

I don't want to talk much about school because this blog is mostly for happy things. Study makes me sad sad sad........=( (*gasp* repetition! sibiliance! *puke*) But because I'll have to go back to studying soon (and start on my essays *sigh*), I'll keep this one short. But if you don't see me around on this blog for a couple of weeks you'll know why =) But knowing me, I won't be able to resist not blogging!
And because studying is messing up my brain, I'll go a little crazy in this post and blog about three things rather than one. Okayokay, enough about the study- onto the happier things- food!
Thursday, October 7, 2010
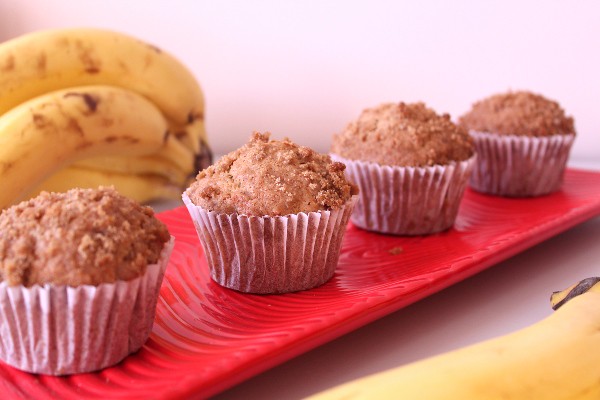
Banana Crumble muffins
And then there are the few dishes each one of us creates which don't fall into our normal category- sort of like signature dishes, although not quite because they're not that good. But these are dishes which other members of the family will rarely attempt.
For me, these special things would be mostly my occasional dinners (like butter chicken or beef rendang) and my yorkshire puddings which I make everytime we have roast (which unfortunately, have never lasted long enough for a photo). My sister's would be her fruit punch, a recipe from one of our first cookbooks. My father's would be his HK style borscht or a couple of dishes he whips up whenever mum's not at home. None of these are particularly special, and could easily be replicated by other members of the family but just never are.
One of my mum's special little somethings is bannana bread, which, funnily enough, comes from my cookbook. She claimed banana bread as her role one afternoon, while I was at school when she made the banana bread from a recipe we'd been looking at.....together! It was an instant hit, and she's been making it regularly ever since.

Although this doesn't mean I'll never make banana bread, this is the reason why most banana bread recipes, as good as they may look and sound, rarely make it to the top of my list of things to bake. And because that list is so long, I've never really gotten around to making banana bread =)
But, when I saw these gorgeous banana crumble muffins here, with their delicious looking crunchy crumble topping, along with the soft fluffy insides I just couldn't help but make them =D And this was before I read on to realise that more than 5,500 other people had tried and loved the recipe too!
Monday, October 4, 2010
Zen Oasis
For one thing, it’s situated one and a half hours away from Sydney, pretty much in the middle of nowhere. Literally. All you can see around here is lots of plain, empty land. The endless flat ground, with dry yellow grass (because we’re in Australia, of course), a couple of lonely, skinny trees here and there and an occasional cow or two- just like the type you see for hours on a long drive along a highway. And to make it a little bit stranger, all the diners here don’t actually come from this area- they all come from suburban Sydney. And then there’s the name of this restaurant, Zen Oasis, which (to me) sounds nothing like a restaurant name really- perhaps a resort of some sort, but not a restaurant.
We arrive by car, slowly along the windy gravel road until we reach the end, to find plenty of other cars already parked there. Never mind that our GPS seems a little lost, with our car sitting in a middle of a big green patch on the screen, with no roads to be seen- at least we’re in the right place! The sight of the large pond draws our attention- perhaps this is the reason for the 'oasis' part of the name? Sitting next to the pond is what appears to be a small wooden cottage- it doesn't take long to figure that the cottage is the restaurant.
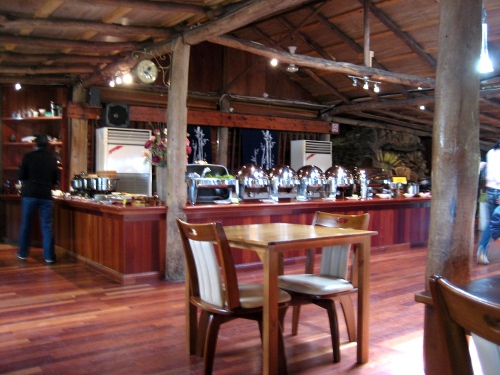
We’re here from the recommendation given by family friends. Apparently, this place has been open for a while and is quite well known within the Cantonese-Chinese community (the same bunch you'll see flocking Eastwood every weekend for their grocery shopping). It’s very popular too- the restaurant opens at 11:30 and we’ve only arrived a couple of minutes later but have already found the restaurant mostly full, with customers already comfortably seated and digging into their food. We are shown to our table, in a small dark corner by a waiter who notifies us of their food wastage policy before we are let loose to grab some of the food we’ve been eagerly awaiting to try.
So- what’s so great about the food that makes people travel so far just to eat it??

To me, it’s not just that the food tastes good; it’s the fact that the food is ingenious. Zen Oasis is a vegetarian restaurant, but instead of serving up plates of veggies and tofu, it serves up seemingly ordinary dishes with vegetarian foods disguised as meat. And you don’t really notice it! The meats are not only replicated in appearance and taste, they are also replicated in texture- even with fake fat within the ‘meat’!
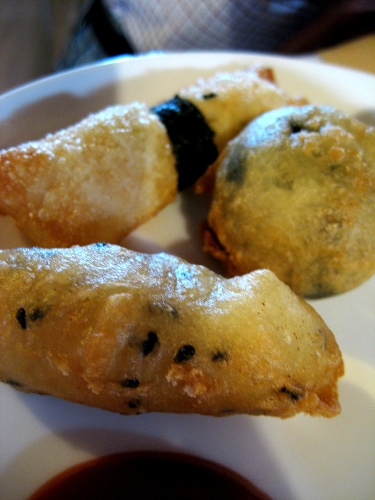
Fried Banana, (and I don't know what the rest are meant to be.....)
Of course, we start with the unhealthy fried foods, which have their own table, separate from the mains. Unlike your typical RSL buffets, there were no fried chips or potato wedges to be found, but instead a more unusual selection of delicious crunchy foods.
I don't usually like fried banana, but I make the exception to try it this time, because the black sesame seeds make it look different and yummier. And it is! It doesn't taste quite as banana-y as most fried bananas I've had (which is a good thing) and the batter is deliciously crispy and crunchy. Made with a similar batter, the round fried ball thing reminds me of fish balls, with its nori wrapping making it extremely tasty.
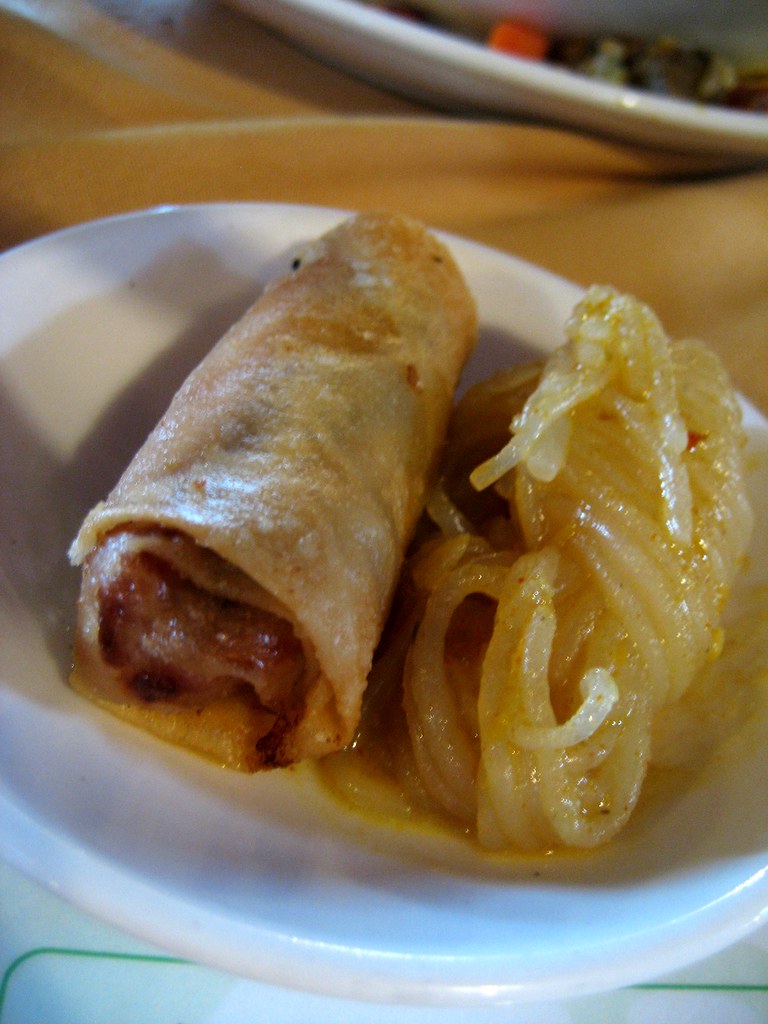
Spring Roll and 'wu cee'
And of course, the beloved spring roll, which is filled with a slightly sweet veggie filling and is delicious with its crispy exterior
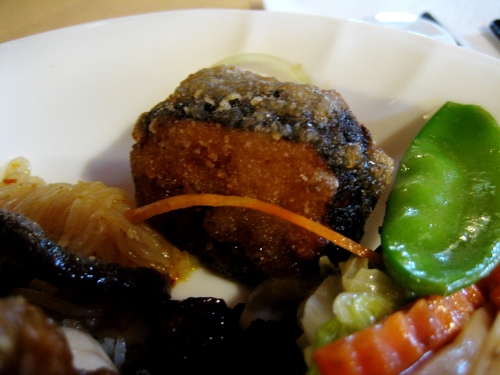
Fried 'Salmon'
Wrapped in a layer of nori, giving it a slight fishy taste, and then fried in a crispy batter, this fried salmon is one of my favourite fried foods. Biting into the crispy batter reveals the tender pink interior which tastes amazingly like salmon- and it even tears off in the exact same way cooked salmon does!
Tuesday, September 28, 2010
Yum Cha Style Mango Pancakes
Mango season has hit quite early this year- although they're not exactly at their best yet, there's always a strong scent of mangoes whenever I venture into a fruit shop. I find this a little weird as I always associate mangoes with December. When I was younger, we used to take boxes of mangoes to Hong Kong for our relatives when we went there just before christmas. Back then, mangoes were at their best just before christmas and we always managed to bring some large, ripe mangoes. But it seems that the mango season is appearing earlier and earlier each year- last year, we only managed to bring a box of small end of season mangoes!
Although I prefer eating mangoes as they are, rather than using them for desserts (as I do with most fruits), my next favourite way to eat mango is in mango pancakes. Yup, the bright yellow ones they wheel around in the dessert trolley at yum cha, always covered tightly in cling wrap with water droplets hanging off the plastic.
I had these for the first time at a yum cha restaurant about 3 years ago, instantly fell in love with them and then realised how simple they were- after all, they're just a simple mixture of mangoes and whipped cream wrapped in a yellow pancake. But that never stopped me from ordering them everytime I spotted one at a restaurant. Even when it's in the middle of winter, and you know that they're using canned mangoes....

So I finally got around to making this yesterday, after seeing the two mangoes which I'd reserved (my sister used the others for mango pudding) starting to rot. I've never been able to find a mango pancake recipe on the internet, one of the resons I've been putting it off for so long, despite my love for it)so I decided to use a crepe recipe as I thought it'd be similar to the pancake I've eaten at yum cha (never mind the fact that I've never actually eaten a crepe before.....), tint it yellow and chuck some whipped cream and mango in there =D And you know what?? It worked!!
I accidently made the crepe too thick because I was scared that if it was too thin, it wouldn't taste like the mango pancakes I had before. And then I think I overcooked it because it wasn't quite as soft as I'd like it AND I also added too much food colouring so it ended up looking pretty cheap, like those ones at yum cha restaurants which you look at and know that it won't taste good but you still order cimply because it's a mango pancake, and you love mango pancake. Or is that just me? Luckily, the mangoes were really good so it didn't taste like it looked =) Infact, they were heavenly!! The mangoes are really the star of the show here so the slight problems with the crepe weren't too noticeable. And so these dissappeared in no time!
I know what I'll be doing with this season's mangoes!

Monday, September 20, 2010
Vanilla Cake for my english teacher!
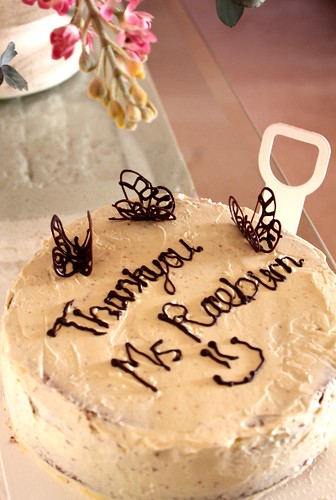
I love the reaction I get from others when I make cake. The oohs and the aahs bring a really nice sense of satisfaction and make me really happy- even when I know the cake doesn't look that great. And although I love baking, it is really this reaction which makes even the boring and frustrating bits of baking all worthwhile.
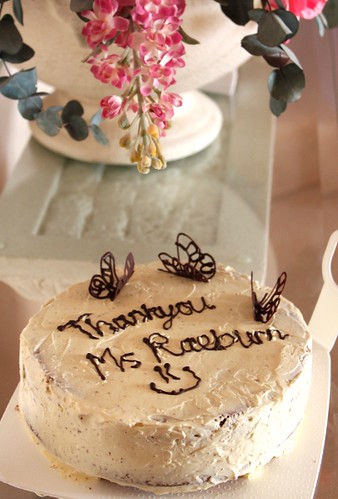
This cake was for my english teacher, perhaps my favourite teacher- so from the beginning, it was completely worth the 4 or so hours I spent in the kitchen slowly trawling through the recipe, making sure I didn't skip a single ingredient, and the decorating after that. And it definitely was- I loved her reaction when she saw the cake- I don't really think anyone has been quite as happy and touched by my cakes before!
It certainly makes it worth the tired arms I get from whipping the batter for 10 minutes- it can get painful sometimes. It makes it worth the frustration of having to wait hours for the cake to be done and the frustration when you have a billion bowls to clean- and you don't even know how you managed to use that many =S
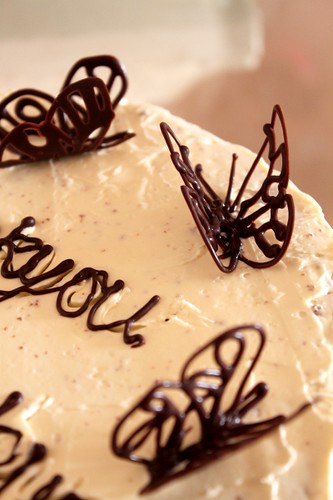
The reaction of my class also made it very worthwhile. Not only the oohs and aahs, especially of the butterflies, the easiest part of it (I stole the idea off Adriana- thanks!) but also the way they kept reaching for seconds. Like those who wolfed down piece after piece after piece *ahem* Andrew *ahem* ;) But I love all of this.
It really makes it worth the frustration of the egg whites not whipping up into stiff meringue- because you couldn't be bothered to clean your bowl cleanly after you used it to make the cake batter. And the consequential 10 minutes of beating in hope that it will. And then the additional 10 minutes of beating in the butter in hope that it will turn into a beautiful, smooth buttercream. It makes it worth the frustration when you realise that you don't have enough buttercream to ice the whole cake. And when the crumbs all mix with the icing to make a lumpy one- so the icing looks like a splat of...something.
But you don't notice all these imperfections when you are bathed in compliments, when you are constantly told how good the cake is. You only stop to think about whether you cake was actually that great a couple of hours later, when you think back and when you look at the picture you snapped hurriedly in the morning before rushing off to school. I guess it's all part of the experience.
Thinking back this time however, it kinda made me sad. Sad that I'll probably never have the chance to make a cake for these people again- school finishes in a few days and I'll probably never see them like this again. But I'll leave the sentimental stuff for another post, and meanwhile, spend the rest of the week treasuring out last moments of high school =)
Yellow cake
from the Better Homes and Gardens Cookbook
Makes one double layered 20 or 23cm cake
3/4 cup butter
3 eggs
2.5 cups plain flour
2.5 tsp baking powder
1/2 tsp salt
1 and 3/4 cups sugar
1.5 tsp vanilla
1 and 1/4 cups milk
1. Allow butter and eggs to stand at room temperature for 30 minutesas. In a medium bowl, stir together flour, baking powder and salt. Set aside
2. In a large mixing bowl, beat butter and sugar with an electric mixer on medium to high speed for 30 seconds. Gradually add sugar, aabout 1/4 cup at a time, beating on medium speed until well combined, scraping sides of bowl. Beat on medium speed for 2 minutes more. Add eggs, 1 at a time, beating after each addition (about 1 min in total). Beat in vanilla. Alternatively add flour mixture and milk to butter mixture, beating on low speed after each addition until just combined. Pour batter into a 20cm or 23cm round cake pan.
3. Bake in a preheated 180 degree (celcius) oven for about 12 minutes or until a wooden toothpick inserted near the centre comes out clean. Cool cupcakes and decorate with buttercream.
Swiss Meringue Buttercream
Recipe from Joepastry
4 egg whites
1 cup sugar
1/4 teaspoon cream of tartar
1 pound soft unsalted butter
1. Begin by combining the whites, sugar and cream of tartar the top of a double boiler set over simmering water. Whisk to combine them, and keep it up intermittently while the mixture warms. In about 5-7 minutes' time, your mixture should have reached 160 degrees Farhenheit (don't worry, your whites won't cook, the sugar will keep all those little proteins from clenching up). At this temperature, Salmonella bacteria are killed
2. Pour the contents of the double boiler into the bowl of a stand mixer fitted with a whip.Turn the mixer on high. In a few minutes the mixture will turn white and start to build up into a foam. Whip for about 6-8 minutes, until the meringue forms stiff peaks
3. Switch to the paddle (beater) attachment and turn the mixer to medium high. Beat in the butter a piece at a time. Whip until the mixture becomes smoother and thick.
Wednesday, September 15, 2010
Strawberry Milk Jelly

You can always tell a chinese recipe, if it has its ingredients separated in Part A's and B's and C's- even if each part only has one or two ingredients =)
I found this recipe at a rather unusual place- on a chinese video website, which we usually use to watch chinese news. If I translated literally from the chinese name it would become 'strawberry cold milk'- unfortunately they didn't have any english translations, so it took me a while to figure out that this was probably panna cotta (I've never had panna cotta before). EDIT: On second thoughts, this is too firm to be panna cotta- I think it's milk jelly =) Which is why I changed the title
This time, it was my mother who suggested we make this- but it's a good thing she did because it has quickly turned into a family favourite which we've made numerous times. The recipe is really simple, the way my mum likes it- it only takes 5 minutes to prepare. And it tastes really nice too! I think it's because of the simplicity of the flavours - the focus is on the light taste of the strawberries. There's nothing too surprising, but a delicious change from my normal heavier desserts- I could easily gulp down the whole batch of these =D
And so could the rest of my family, in particular, my father who keeps requesting for another batch to be made each time we buy strawberries!
Strawberry Milk Jelly
Part A
160g sugar
15g gelatine powder
150g water
Part B
5-10 strawberries, depending on size
150g milk
150g cream (recipe didn't specify but I used thickened cream)
150g cold water
1. Sprinkle gelatine powder over water (from part A) in a small saucepan; let stand 5 minutes to soften. Add sugar and place over low flame and heat until gelatine powder and sugar dissolves.
2. Puree the strawberries in a blender until smooth (you'd also want sieve it to remove the seeds) and then mix with all the other ingredients in part B.
3. Stir the gelatine mixture into the strawberry mixture. Pour into moulds and chill for at least two hours before inverting onto a plate to serve.Note: This panna cotta is a lot firmer than what I'd imagined panna cotta to be, so I'm not sure if it's technically a panna cotta- it's sort of like a firm milk jelly. BUT it still tastes delicious =)
Wednesday, September 8, 2010
[Perhaps] My Favourite cake

My parents came home on Sunday to find my hands in a rather unusual place- in the sink. My mother rolled her eyes- "What have you been up to this time??" I thought it would have been obvious from the warm scent of butter and sugar wafting in the air. Or maybe it was supposed to be a rhetorical question. "Washing the dishes of course!" I answered cheekily.
When my parents leave me at home, it can almost be expected that I will bake something. When else would I find the time to do whatever I want in the kitchen, without being told to move stuff out of the way, or to neaten things up and to remind me to put things back?? But this Sunday, I was supposedly supposed to study for my english exam on Monday which is why my parents were somewhat surprised that I was baking rather than studying.
They shouldn't have been- I always bake when I have exams. You would've have thought they'd have figured out by now!
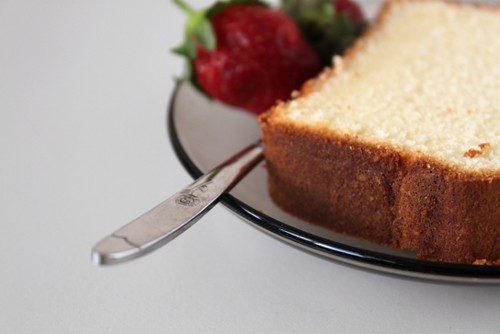
Ever since I started baking, every event has turned into an excuse to bake, and so my reason for baking this time, was father's day. Baking for my father isn't too difficult- he never has too much to say about anything I bake other than the usual
Natuarally, anything studded with raisins, whether it be a cake or bread would please him fine- but of course, I didn't want anything as straight forward and simple as that. I wanted something with a little more of a 'wow' factor, not necessarily something difficult or decorative, but something which tasted extra good- which brought my mind back to this sour cream pound cake recipe I hadn't made for at least two years.
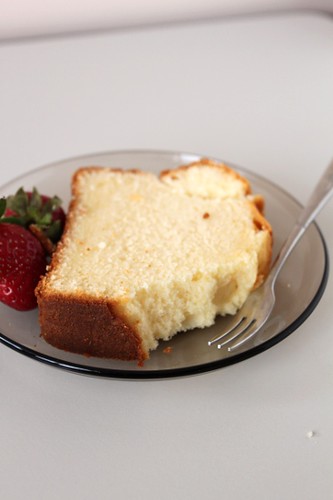
If you say pound cake, I immediately think of the Sara Lee frozen pound cakes. My parents would occasionally take us to the Sara Lee factory outlet when I was young, to buy a couple of pound cakes. Although we'd occasionaly spy these cakes at the supermarkets, they were never in the range of flavours they had here- chocolate, strawberry, vanilla, coffee and even honeydew melon!! It's been ages since I last had one, but I can still remember quite clearly, the soft texture of the cake and the taste of each of the flavours. I ate them at any time of the day, even for breakfast, and particularly loved eating them straight out of the freezer, when they were hard and freezing cold.
It was these memories that had first inspired me to try making pound cake, a couple of years ago, but my internet searched resulted in recipes with an awfully high amount of butter which I just couldn't bring myself to using. I settled for a simple sour cream pound cake in a cookbook on my shelf, knowing that it wasn't anything like it.
Not surprisingly it didn't actually turn out like the Sara Lee pound cakes either. But we were absolutely astounded at the cake- it was deliciously smooth, soft and had a rich buttery taste! We easily gulped it down within a day and it was one of the few recipes I'd actually made more than once! Back then, I didn't have a loaf tin, and used an old foil tin which my mother had washed out, before upgrading to a new foil tin (from the supermarket) for my second cake and eventually ended up buying a loaf tin- just for this cake.
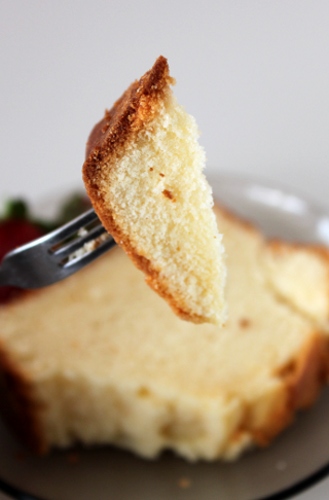
I don't know how this recipe got forgotten over the last years, but when I got it out again to try on Sunday, it was recieved with an even better response from my family. From the first bite, we could tell the recipe was a keeper (my family had completely forgotten that I'd ever made this cake before)and I immediately got requests to make it again. I think it goes without saying that the cake was gone within minutes, despite only just having finished dinner. And so I made it again, infact, I doubled the recipe to make two cakes yesterday when I came home after school. And because we loved this cake so much, when I realised we were out of sugar yesterday, we didn't mind walking out to the supermarket just to buy sugar for it.
The texture of this cake is incredible. It's so amazingly light and soft that it's comparable to sponge cake only not as fluffy and still retains its slightly firm texture. It isn't dry, but a little moist from the yoghurt, but not too moist that it doesn't seem like pound cake- it sits perfectly in the middle of dry and moist. Just the way I like it.
And the taste is just as good- it's rich and buttery, but not overwhelmingly so. The taste isn't anything special, but rather accentuates the delicious simple flavours of butter and vanilla. You could always change the flavours, but I think the simple vanilla flavour works well, putting a little more emphasis on the texture of the cake, whilst tasting delicious at the same time. I used yoghurt this time because that was what we had in the fridge but they both work the same. The sourness does not come through unless you concentrate really hard on tasting it- no one in my family noticed I used yoghurt! But the slight sour taste does give the taste that little something, making the flavour taste just that little bit better!
This is the type of cake which is so addictive, you just know you could eat the whole thing, by yourself, all in one go. They type which you'd almost do anything just to have another slice. I don't know why the cake turned out to be a little different to my previous tries, especially in terms of texture, but I have a feeling that if I froze this one, it would be very similar to the vanilla Sara Lee pound cake- but the cake doesn't last long enough for me to even try freezing it!
Now, back to Father's Day- my parents had came home early on Sunday, which was why I was still washing up, rather than innocently slaving my way through my english book. My dad wanted to mow the lawn before it got dark, leaving plenty of time for the cake to cool, but left me with the job of fending off hungry sisters and mothers from the cake =) By the time we got around to eating the cake, it was past dinner. And my dad's first reaction??
"Why didn't you put raisins into the cake??"
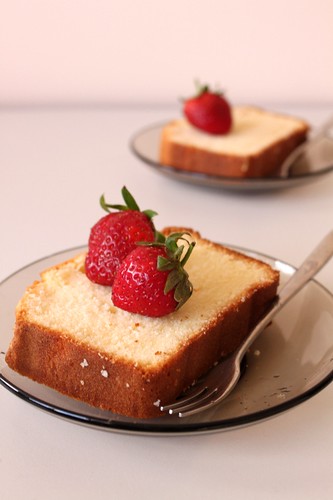
Sour Cream/ Yoghurt Pound Cake
from the Better Homes and Gardens Cookbook
½ cup (113g) butter (I reduced it to 90g)
1 cup sugar (I decreased it by a bit)
3 eggs
½ cup sour
cream/yoghurt
1 ½ cups plain flour
¼ teaspoon baking powder
1/8
teaspoon baking soda
½ teaspoon vanilla extract
1. Allow butter, eggs and sour cream (or yoghurt) to stand at room temperature for 30 minutes. Meanwhile, grease and lightly flour a 8x4x2 inch or 9x5x3 inch loaf pan; set aside. In a medium bowl, stir together flour, baking powder and baking soda; set aside
2. In a mixing bowl, beat butter with an electric miser on medium to high speed for 30 secs. Gradually add sugar, beating about 10 minutes or until very light and fluffy. Beat in vanilla. Add eggs one at a time, beating 1 minute after each addition and scraping bowl frequently. (EDIT: beat eggs only until just incorporated- if you overbeat, the cake will not turn out light). Alternately add flour mixture and sour cream (or yoghurt) to butter mixture, beating on low to medium speed after each addition until well combined (EDIT you want to beat as little as you can to keep the batter light, so beat only until just combined and don't add the cream/flour in too many additions). Pour batter into the prepared pan.
3. Bake in a 325oF (160oC) oven for 60 to 75 minutes, or until a wooden toothpick inserted near the centre comes out clean. Cool in a wire rack for 10 minutes. Remove from pan; cool.
Also note that the cake tastes better when cooled =)
Saturday, September 4, 2010
Butter Chicken
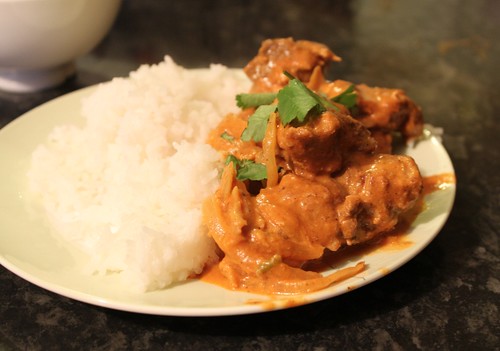
How much butter is actually in butter chicken??
I'd always just assumed that there was a lot, after all, there must be a reason why they name it butter chicken! I mean, butter cakes have a lot of butter in them. Butter cookies also use plenty of butter. And buttercream is made of butter!
Funnily enough, it didn't really occur to me until after I made this butter chicken, that there was no butter in this recipe at all! (this can be explained- it's actually replaced with cream!) I chose this recipe because there were only two spices I needed to buy, but only found out that I didn't have half the ingredients after I decided to make this. And I did make a huge mess in the kitchen. But it was all worth it because it tasted really delicious, with my sister accusing me of making her fat afterwards ;)
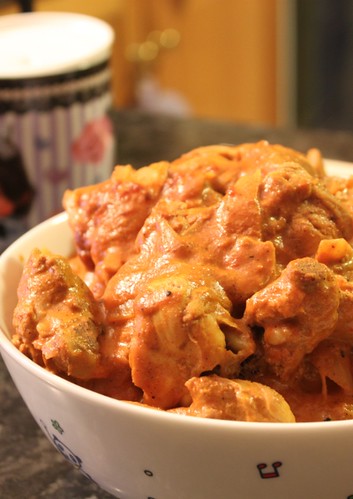
Butter Chicken
Recipe from Almost Bourdain
140 g (1/2 cup) Greek-style yoghurt
3 cm piece ginger, peeled, finely grated
2 cloves garlic, crushed
2 tbsp garam masala
1 lemon, juiced
2 tbsp olive oil, plus extra, to grease
1/4 cup roughly chopped coriander, plus extra leaves, to serve
800 g chicken thigh fillets, cut into 3 cm-wide strips
2 tbsp ghee (clarified butter)
2 onions , thinly sliced
1 tsp ground turmeric
1 1/2 tbsp tomato paste
2 long red chillies, seeded, finely chopped
260 g (1 cup) passata (sieved pureed tomatoes)
300 ml pouring cream
1 bunch mint, leaves picked, finely chopped
Basmati rice and pappadams, to serve
1.Combine yoghurt, ginger, garlic, 1 tbsp garam masala, lemon juice, oil and half the coriander in a large bowl, then season with salt and pepper. Add chicken and toss to coat. Cover with plastic wrap and refrigerate for 3 hours.
2.Preheat a lightly greased barbecue or chargrill pan over medium-high heat. Remove chicken from marinade and cook, in 2 batches, turning for 6 minutes or until almost cooked through.
3.Heat ghee in a large saucepan over medium heat, add onions, turmeric, tomato paste, chillies and remaining garam masala, and cook, stirring, for 5 minutes or until onions are soft. Add passata and cook for 5 minutes or until thickened slightly. Reduce heat to low, add cream, mint and remaining coriander, and cook, stirring, for 2 minutes. Add chicken and simmer, stirring occasionally, for 15 minutes or until sauce thickens. Scatter with extra coriander and serve with rice and pappadams.
Friday, August 27, 2010
Meidi BBQ House

Thankyou so much everyone who wished my blog a happy birthday!! And for wishing me good luck in my exams- which was when I realised I didn't tell you my exams are over!! Actually they finished last Wednesday =) Which is why I've spent this week relaxing and doing the things I want to do.......and ignoring any homework I have =D
So, when I finished my exams last Wednesday, I celebrated with a bit of food and fun at Meidi BBQ house, which I'd been itching to try ever since I first set eyes on this sign advertising a self rotating BBQ. We'd walked past this sign a couple of Saturdays ago, after yum cha at Prince Restaurant, and noticed that this new restaurant had opened and although it wasn't open (it only opens at night), we could see the individual rotating BBQs inside. There was also a list on the front, advertising all the food it had on offer which seemed like a pretty big selection of both cooked and uncooked food, and even better, for the price of $26.80 (for groups of 4 or more)!
Note: Apologies for the bad quality of photos- my camera battery died within the first 5 minutes so most of these photos were taken on my mum's phone (and this happens to be my first post using pictures taken with a phone....haha)
After checking the sign again to make sure that it was $26.80, we walk into a pretty busy restaurant, considering that it's a Wednesday night. The seats are weirdly low, making it terribly diffcult to get up (or maybe it's just because I'm heavy....haha) and we've barely had time to sit down before a tub of hot coal is quickly wheeled out and inserted into the barbecue. With a click of a switch, the chain in the barbecue begins to run- our cue to start barbecuing. After all, there is a two hour time limit.
However, we quickly find that one barbecue, which has space for 13 skewers, isn't quite enough for four people (at least, in two hours)- it's better for perhaps two or three people.
The food is very nothern chinese style, which consists of a lot of chillies and strong flavours. My inability to eat spicy foods means I'm not a huge fan of northern chinese food. Fortunately, the food isn't too hot- even I could eat almost everything.
Whilst the food is happily cooking itself on the barbecue, we try the selection of cooked food. The selection is quite big, and tasty, which is a good thing because we'd never fill ourselves up at the rate that the food was cooking on the barbecue. The chicken stir fry wasn't anything special, and was a little too salty for our liking. Broad Bean Stir Fry
The broad bean stir fry was one of our favourite hot dishes, perhaps because the flavours weren't too strong, the fact that we like broad beans and that there were barely any greens in the selection of food.
Clockwise from top left: tea eggs, dumplings, corn, fish fillets in hot chilli oil, bread, eggplant with garlic sauce
And because none of these photos look appealing I'll just shove them all into one =P
The fish fillets in hot chilli oil, a common chinese dish known for it's hot-ness because of the chillies, was surprising not hot and had no distinctive taste. Not surprisingly, I stopped after a nibble or two and didn't bother going back for seconds.
The bread was ordinary but we found that if we heated it over the barbecue, it tasted pretty good as the edges would become crisp. The eggplant with garlic sauce was again much too salty and the tea eggs were mostly untouched so we didn't touch them either.
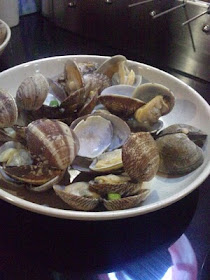 Stir Fried Clam with Chilli
Steaming hot food just brought out of the kitchen never fails to capture my attention at buffets and it's almost a natural instinct to grab it while it's hot, no matter what it is. In the case of these stir fried clams, which we notice are steaming as they come out, they were indeed hot, but very disappointing. Compared to the other food on offer, they were relatively flavourless and without looking at the name tag in front of it, I wouldn't have realised about the chilli- there was barely any. I personally thought they were okay, but more because I like clams and they're quite different to everything else but they definitely lacked in flavour, and were a bit dry too. My parents didn't like them said they tasted tasted sand, which is something I can never really taste in seafood.....I'm sorta thankful that I can't =) Dumplings, chicken wings
Perhaps the dryness and the flavourless-ness of the clams could have been saved if there was some sort of dipping sauce such as soy sauce, as they have in Korean barbecues. But there were no sauces whatsoever, which was one of the things that we didn't like about the restaurant. Although the flavours in most of the food were really strong, without any sauce, the barbecued food, in particular, seemed dry.
 From left to right: radish salad, some sort of jelly, cold chicken
Northern chinese food wouldn't be quite complete without a selection of cold foods to balance with the hot food. The simple radish salad, of thin strips of radish and an occasional carrot strip or two, complimented the strong flavours of the strong flavours of the barbecued food quite well. The light, tangy dressing with the simple flavours of radish brought relief not only from the spiciness of some of the food, but also from the saltiness of the barbecued food.
 Cold Beef
But cold food doesn't lack in flavour either the cold beef is quite flavoursome and slightly spicy too. The savoury jelly (I don't know what it's called in english) is is also a deliciously flavoursome cold dish. It isn't too salty, which is a relief and being cold, it is again quite a nice accompaniment to the hot, barbecued food. It is quite delicious and we find ourselves eating quite a lot of it, but the jelliness of it, which indicates the amount of fat in there tells us that perhaps, we shouldn't be eating as much as we do.....
 Cold Chicken
The cold chicken does not manage to please us, mostly because the chicken is not quite tender anough for our liking.
 From left to right: prawn, chicken heart, prawn, [don't know], prawn, wagyu beef, rice cake, chicken satay, chicken satay, prawn, fish
Now...back to the barbecue itself- the most fun part of the night.
There was good selection of foods to barbecue, from wagyu beef (which to me, didn't taste any different to normal beef....so I'm guessing it isn't the good quality stuff) to mongolian lamb to chicken wings and prawns. Oh, and there were chicken hearts and intestines too ;) The meat was cut up into small cubes and skewered so that they would cook quickly.
However, we found the marinades to be much too strong, even for us (we usually like things with stronger flavours than most people like) and left us very very thirsty afterwards. Infact, they were so strong that we often could not tell what we were eating- we lost of track of which skewers were the beef and which were the lamb (and what flavours they were supposed to be)

But, it's not to say I didn't like the food. Some of the food was really good- for instance, the shitake mushrooms (yeah, they were on a skewer) which only took a couple of minutes to heat up =] And the chicken satay skewers were delicious too- and a good change from the spicy marinades of the beef and lamb skewers. The prawns were delicious, although we accidently overcooked them a few time, making them difficult to unshell. And they were a pain to get off the stick. We're not ones who usually go for mussels at buffets but these barbecues mussels were big and delicious- we kept going back for more! The rice cakes were interesting- they tasted more like bread than rice cakes and were very very hard...I think we barbecued them for too long (oops!)

I love trying weird animal parts, so it was not much of a surprise that I went for the pig intestines and the chicken heart =] Which was recieved with groans by my mum who feared that they would make me sick- so we barbecued them for ages.....
Which ended up with them tasting overcooked, but they didn't taste that great anyway. The chives were a highlight of the meal- somehow, they marinated the chives so that they were very very flavoursome......which probably means that they used a lot of msg or something bad for us but they tasted so good, we didn't really care =D
 Red Bean Dessert
To balance the very salty mains, there was dessert! The red bean soup was a little watery, like most red bean soups at restaurants (I like mine thick) and has blobs of both red bean and black rice which gave it a funny texture. Served hot, it wasn't too bad but it wasn't exactly my favourite....

Because this one was!
A simple sweet soup with 'snow ear' fungus and red dates, it tasted surprisingly refreshing and was actually a great 'drink' accompanying the salty and spicy food. Yeah- I didn't actually eat it as a dessert but drank it instead!

In the cold food section, there were these purple and yellow jellies, but which had 'cucumber' written in front of them, causing much confusion. We scooped a few out to try whilst we were waiting for the food to cook in the barbecue and they were simple sweet, milk jellies- I couldn't pinpoint a specific flavour to them. Nevertheless, they were delicious and I would have eaten more, only they didn't refill them =[
We finally finished the barbecuing, 10 minutes short of the limit, but already stuffed from all that we ate. Counting the skewers (which seemed to be a common activity everyone did), we reached a grand total of 52 skewers which I personally find dissappointing, considering that equals to about 13 skewers each.....haha
But then again, we did eat a lot of the cooked food because the food took a while to barbecue so I guess it's understandable.....
Tucked up in the corner, away from all the other food was a mysterious little freezer which had the words 'ice cream' roughly scribbled on a paper stuck to it. Curious to see, we opened the freezer, which, was no easy feat (the lid was stuck strongly on!) to find a tub of vanilla ice cream along with about 4 unopened ones underneath it (which is how we found out that it was homebrand ice cream..haha) A nice way to end the meal, we ate a couple of scoops of ice cream.
But plain vanilla ice cream can be boring, so to jazz it up, I came up with an idea to pour the red bean dessert over to make red bean ice cream! haha.....
We had some red bean dessert left over, which hadn't quite completely cooled down yet, but seeing as it was time to go we poured it over anyway to create a delicious red bean ice cream dessert =]
Overall, I thought it was a really fun experience, even if the food wasn't all that great. I'm not sure if I'd go again, but I think it was worth it, just for the experience!
Meidi BBQ House
Shop 4/100 Church Street
Parramatta
9635 9098
$28.80 pp (Mon-Thurs) or $26.80 pp (4 or more people)
don't remember the price for other days.....

